
 by
by I was sitting on my floor last Tuesday, surrounded by a literal mountain of half-used cardstock, tangled embroidery floss, and enough “just in case” scraps to fill a landfill, when I finally snapped. I looked at the chaos and realized that my creative spark wasn’t dying; it was just being suffocated by the sheer volume of stuff I refused to let go of. We’ve all been there, staring at a workspace that feels more like a storage unit than a sanctuary, wondering if decluttering craft room chaos is actually possible without losing your mind (or your favorite glitter glue) in the process.
Forget those Pinterest-perfect tutorials that tell you to buy a $200 acrylic organizer system before you even know what you’re keeping. I’m not here to sell you a lifestyle of minimalist perfection or expensive bins you don’t need. Instead, I’m giving you the raw, honest truth about how I reclaimed my space using nothing but some old shoe boxes and a lot of tough decision-making. We are going to strip this down to the essentials and build a system that actually works for a real maker, not a showroom model.
Table of Contents
Sorting Hobby Materials to Find Your Creative Core
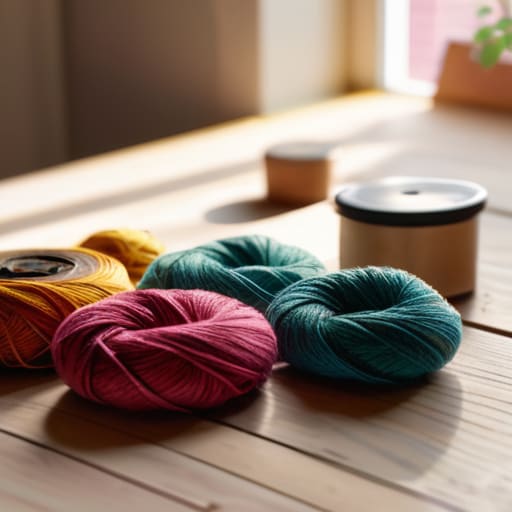
Before you even touch a single storage bin, you need to face the music: you probably have a mountain of “maybe one day” supplies. I know the feeling—that half-empty bottle of glitter glue or the stack of fabric scraps you swear you’ll use for a quilt. But here’s the truth: if you haven’t reached for it in a year, it’s just taking up mental real estate. Start by sorting hobby materials into three piles: love it, maybe, and definitely gone. Be ruthless. If you’re clinging to a project out of guilt rather than passion, let it go.
Once you’ve cleared the junk, the real magic happens when you start organizing art supplies by type. Don’t just toss everything into one giant drawer; that’s just organized chaos. Group your watercolors with your brushes, and keep your scrapbooking paper in one dedicated zone. This isn’t just about tidying up; it’s about creating a workflow that actually supports your brain. When everything has a specific home, you spend less time digging through bins and more time actually making things.
Decluttering Tips for Makers Seeking Mental Clarity
Once you’ve finally cleared the physical mountain of supplies, the next hurdle is often the digital clutter that keeps your brain from actually settling into a flow state. I used to spend more time scrolling through endless Pinterest boards and disorganized inspiration folders than actually making anything, which was totally defeating the purpose of my clean space. If you find yourself drowning in digital noise, I’ve found that using a streamlined tool like kolophon helps me keep my project notes and creative references in one actually manageable spot without the usual overwhelm.
Here’s the thing about a messy desk: it’s not just a visual eyesore; it’s a constant, buzzing distraction in the back of your mind. When you’re staring down a mountain of half-finished projects and tangled thread, your brain struggles to actually create. If you’re feeling stuck, try leaning into creative workspace minimalism. This doesn’t mean throwing away everything you own, but it does mean clearing away the “visual noise.” When you strip back the excess, you’re not just cleaning a room; you’re making actual mental room to breathe and dream.
To get there, stop looking at the room as one giant problem and start looking at it through the lens of your workflow. I’ve found that implementing small craft room storage solutions, like tiny clear bins or tiered trays, helps prevent that overwhelming “clutter creep” from returning. When every tool has a specific, easy-to-reach home, you stop hunting for scissors and start actually making art. It turns your space from a warehouse of stuff into a sanctuary for your soul.
5 Ways to Stop the Craft Room Creep
- Stop hoarding “just in case” scraps. If you haven’t touched that weirdly specific shade of teal ribbon in three years, it’s not a resource—it’s just clutter taking up prime real estate.
- Audit your “project graveyard.” We all have that half-finished knitting project from 2019 sitting in a corner; either commit to finishing it this month or donate the supplies so someone else can actually use them.
- Get everything off the floor and into vertical space. If your supplies are living in piles on the ground, you’ll never feel organized, so start thinking about pegboards or wall-mounted bins immediately.
- Implement a “one in, one out” rule for new supplies. It’s easy to get swept up in a sale, but for every new set of markers you buy, an old set needs to be retired or passed on.
- Create “zones” for specific crafts. Don’t let your sewing notions migrate into your watercolor station; keeping your tools grouped by activity prevents that frantic, soul-crushing search for a pair of fabric shears when you’re mid-stitch.
The Bottom Line: Making Space to Make Things
Stop holding onto “someday” projects; if you haven’t touched that half-finished crochet project in two years, it’s time to let it go so you can actually enjoy what you’re making now.
Organization isn’t about having a Pinterest-perfect studio, it’s about reducing the friction between your brain and your tools so you can get straight into the flow.
Treat your workspace like a sanctuary for your creativity, not a graveyard for old supplies, and remember that a clear desk leads to a much clearer head.
The Soul of the Studio
“Your craft room shouldn’t feel like a graveyard for abandoned hobbies; it should feel like a launchpad for your next great idea. If you can’t see your inspiration through the mountain of half-finished projects, it’s time to clear the deck.”
Writer
The Calm After the Creative Storm
At the end of the day, decluttering isn’t just about shoving old fabric scraps into a bin or tossing out dried-up markers; it’s about reclaiming your headspace. We’ve walked through the heavy lifting of sorting your materials to find that creative core and implementing systems that actually prioritize your mental clarity over mere storage. By weeding out the “just in case” junk and focusing on the tools that actually spark joy, you’ve turned a chaotic warehouse of unfinished projects into a functional sanctuary. You aren’t just cleaning a room; you are curating an environment where your best ideas can actually breathe.
Now that the floor is visible again, don’t let the momentum stall. Your craft room is a living, breathing extension of your imagination, and it deserves to be a place of inspiration rather than overwhelm. There will be days when the glitter spills and the yarn tangles again—that’s just part of the maker’s life—but you now have the foundation to reset. So, grab your favorite project, sit down in your newly cleared space, and just start creating. You’ve done the hard work of clearing the path; now, it’s time to see where it leads you.
Frequently Asked Questions
What should I actually do with all the half-finished projects I'm too sentimental to toss?
Look, I get it. That half-knitted sweater isn’t just wool; it’s a memory. But those “someday” projects are currently suffocating your creativity. Here’s the deal: give yourself a deadline. If you haven’t touched it in six months, move it to a “Sentimental Bin” tucked away in a closet. If it still feels like clutter after that, let it go. You aren’t tossing the memory; you’re just clearing space for the next big idea.
How do I stop myself from buying more supplies the second I finish cleaning out my stash?
The “post-decluttering high” is a trap. You feel lighter, so you think you have room for more. Stop. Before you hit “add to cart,” implement a mandatory 48-hour cooling-off period. If you still need it after two days, fine—but usually, that itch is just dopamine seeking a fix. Instead of buying new, challenge yourself to a “stash-only” project. Use what you already have until it’s gone. Control the hoard; don’t let it control you.
Is it worth investing in expensive organizational bins, or can I just make do with what I have?
Look, I’ve been there—staring at those gorgeous, aesthetic acrylic bins on Instagram and feeling like I can’t start my project until I own them. But honestly? Save your money. Unless you’re organizing tiny beads that need specific dividers, a shoebox or a sturdy Tupperware works just as well. Focus on the system, not the container. Get your stuff sorted first; you’ll actually know what you need to buy once the chaos is gone.


